|
Tartan 30 Exhaust System Repair - September 2008 |
|
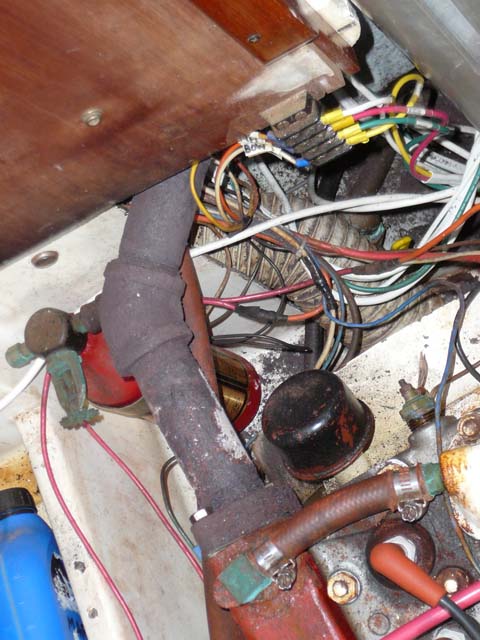
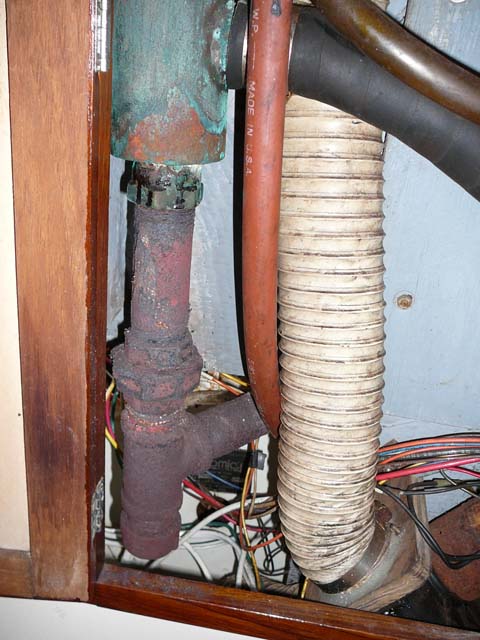
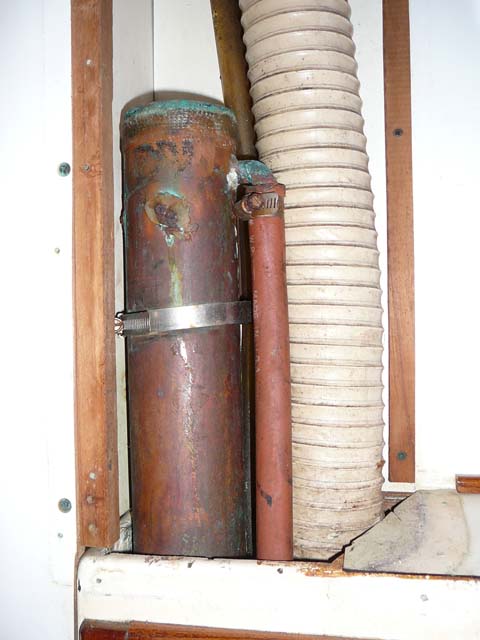
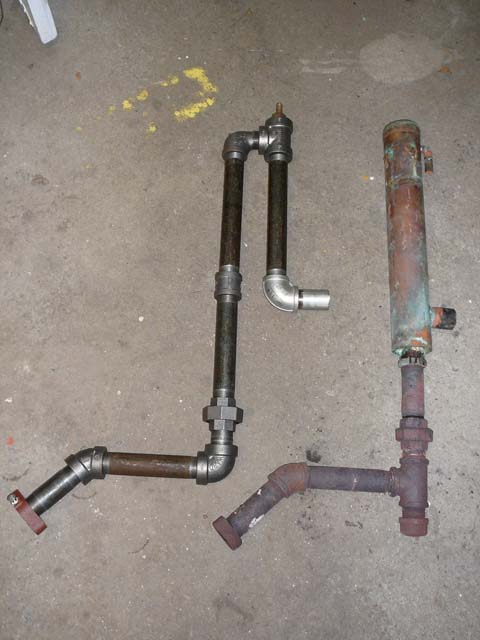
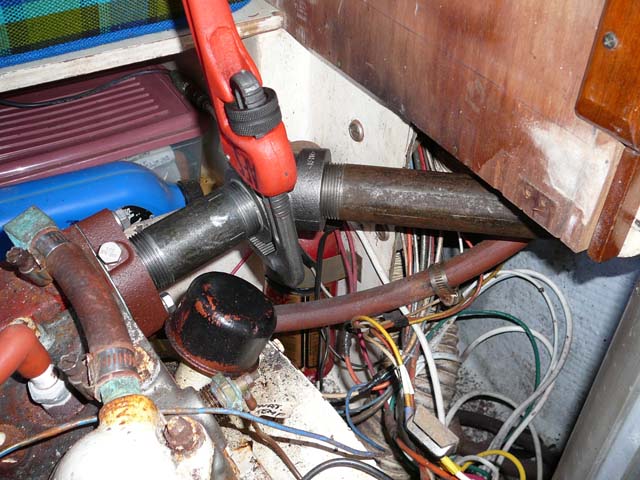
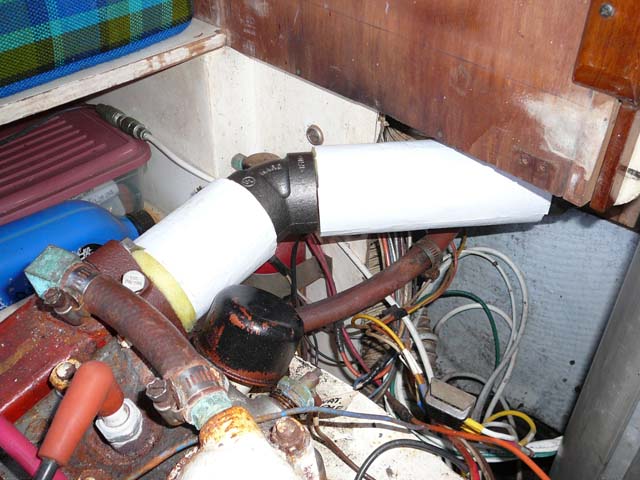
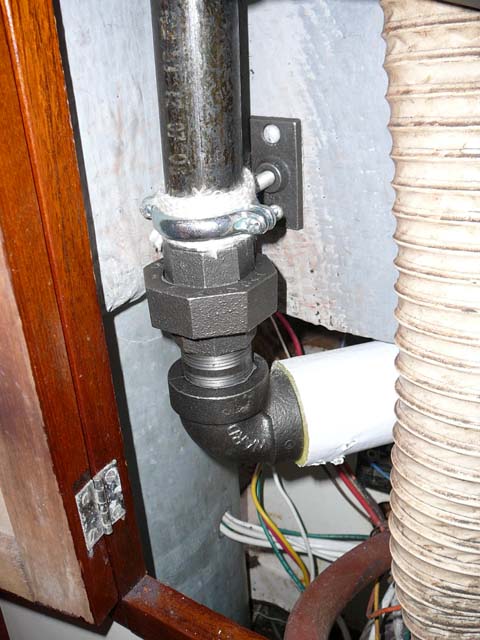
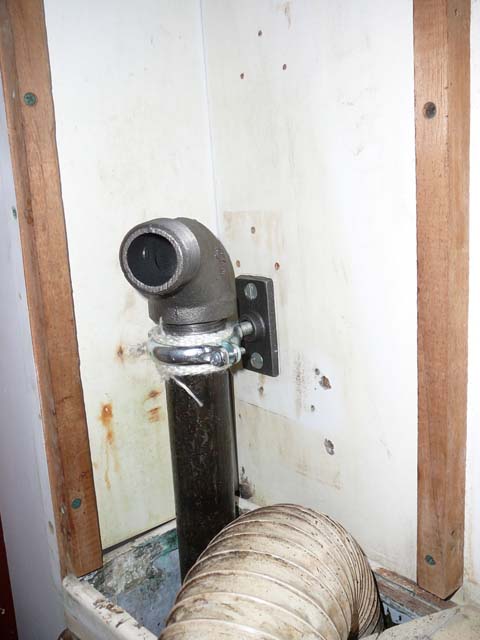
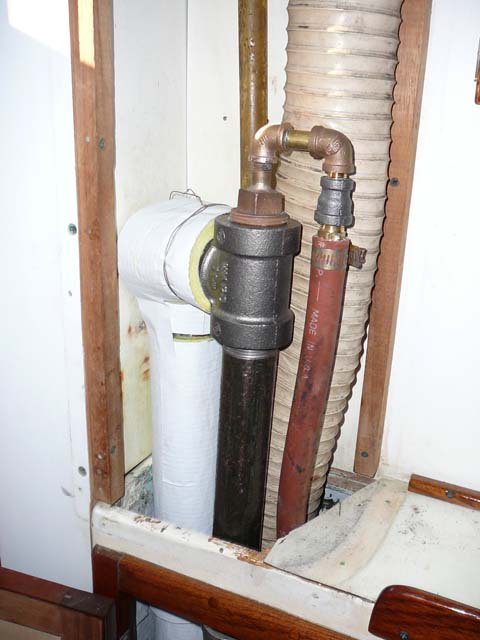
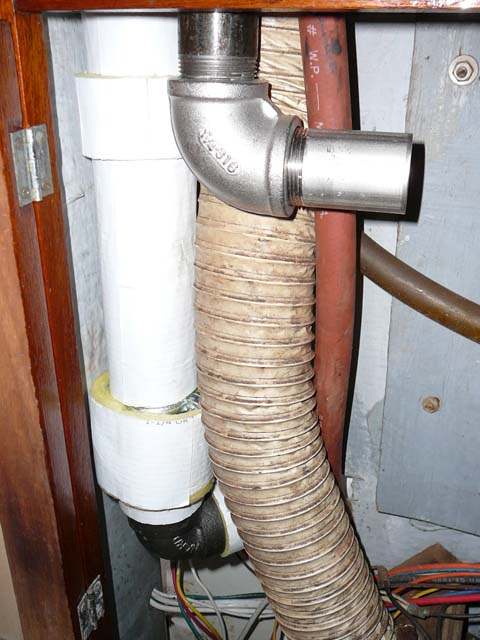
We were heading West from Block Island when I went below to get rid of some used coffee. "Gee, kinda smokey in here" says I. Back in the main cabin, I lift the engine cover and find more smoke. Hmmm. But a hand on the thermostat shows the engine is running cool. Oh well, time for the old exhaust system job. After returning to the marina and settling in at home, I figured it was time to tear things apart. The following photos show things with the fiberglass tape removed. Needless to say, the source of the exhaust leak is not evident. But, replacement is obviously required. Even the copper mixing can looks a bit sick. At this point, I made some measurements of the exposed lengths of pipe between fittings, plus the clearance of the mixing can to the adjacent parts of the boat. The mixing can as shown was just about hard against the inboard panel, but had about 1.5 inch clearance aft. The left photo shows the system at the manifold. The bolts at the manifold were stainless, looked good, and came out with no problem. Center photo shows the lower end of the riser feeding into the can. That union is NOT coming apart without a flame wrench. Photo also shows the discharge hose from the can, the discharge hose from the vent blower, the discharge seawater hose from the manifold, and the water tank vent. Right photo shows the top of the mixing can with the sea water hose, the blower hose, and a bit of the vent hose. Not much room there. I was starting to wonder if the new system would fit. This photo shows the new (left) and old systems laid out on the garage floor. The old system has been cut for removal, while the new system is just hand tight for placement. The new exhaust flange and the new water injection (at the top of the Tee) are from Moyer Marine - all the rest is from McMaster Carr, including the stainless elbow and the stainless nipple (threaded one end). All 1 1/4 inch pipe stuff. The union seems to be necessary for installation. The coupling is just so I could buy nipples rather than a custom piece of pipe. The similarities in dimensions are obvious. I really would have rather gone with another mixing can, but I couldn't find a source and I didn't feel like making another one. The left photo shows the exhaust flange in place, and the first pieces of piping going in. The idea here is to make the elbow and first nipple tight (as the Germans say 'Gutentight') while the second nipple comes out level or horizontal. The right photo shows the insulation added to the nipples. This stuff is good for 850 deg F. The insulation is 1/2" fiberglass, covered with aluminum foil, then a heavy paper wrapper with an adhesive tab (McMaster #5556K14). I haven't covered the elbow yet, but might use the same or perhaps just fiberglass tape. These photos show the riser pipe in place with hangers top and bottom. The hangers are McMaster #3023T27, while the mount plates are McMaster #11445T1. The hangers are oversize for the pipe to allow some room for fiberglass tape insulation. The two are connected by 3/8 inch all-thread. These photos show the current state of the riser installation. The left photo shows the riser with insulation, the Tee, and the seawater injection fitting. I'm guessing the water injection will keep the Tee relatively cool, otherwise it will get insulation too. The Moyer fitting is 1/4" NPT. The hose barb is 5/8 hose to 3/8 NPT. The reducing union is steel, as that's all the hardware store had in stock. Right photo shows insulation in place over the coupling and the union. The elbow still needs to be insulated. The nipple on the outlet of the Tee probably should have been stainless (at an additional cost of $50) but we'll see how black iron lasts. Anyway, that's where we are today as of 9/21/08. What these photos don't show is the piping downstream of the 'hot stuff'. Hose - muffler - hose, what can go wrong with them? All rubber, right? Turns out the muffler was connected to the hoses using short pieces of black iron pipe, one of which crumbled in my hands as I was disconnecting the first hose. Those pieces of pipe are still to be replaced. |